Español
  Polski
  Greek
Greek  Italiano
  Turkish
  简体中文
简体中文  English
LABORATORY POD PROTOTYPING EQUIPMENT
Produce Real Pod Samples Inside Your Laboratory
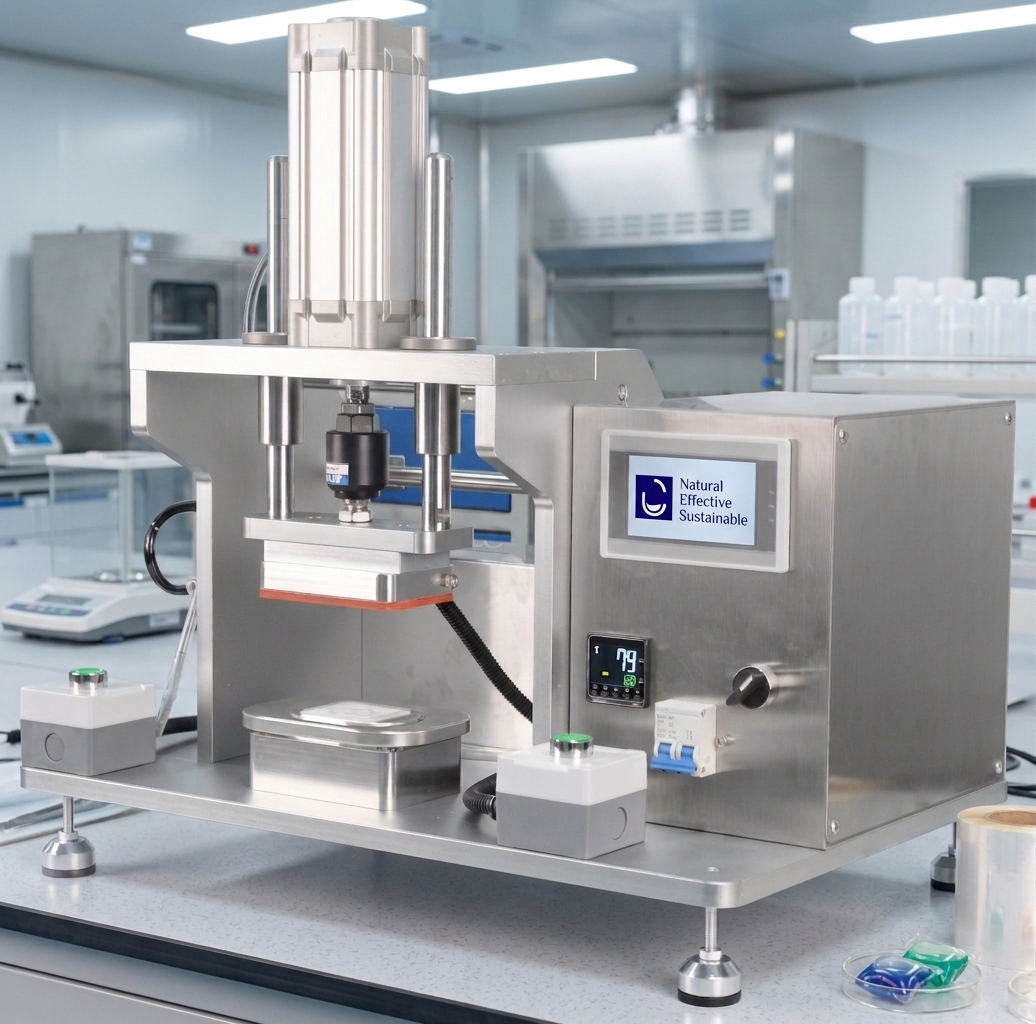
The Laboratory Pod Prototyping Machine is a compact forming and sealing tool for producing water-soluble laundry, dishwasher and cleaning pod samples.
It gives a formulation or materials laboratory the basic capability to turn a formula, PVA film and mold design into a physical pod for subsequent compatibility, stability, dissolution and performance evaluation.
A SIMPLE TOOL WITH AN ESSENTIAL ROLE
The Starting Point for Physical Pod Validation
A pod is a connected product system involving formulation, PVA/PVOH film, mold geometry, filling, sealing and storage. Many interactions cannot be evaluated fully until a representative pod has been produced.
Without a Physical Sample
The laboratory can study a formula or an ingredient separately, but it cannot fully observe how the formulation, film, chamber structure and sealing system behave together.
With a Prototyped Pod
Researchers can produce a real sample and continue into compatibility, ageing, dissolution, performance and product-design evaluation.
Core Role
The machine is not a miniature production line. It is the basic sample-making tool that connects formulation work with physical product validation.
CORE MACHINE FUNCTIONS
Form, Fill and Seal Laboratory Pod Samples
The benchtop system combines pneumatic movement, vacuum forming, a heated pressing area, replaceable molds and adjustable controls.
Adjustable Controls
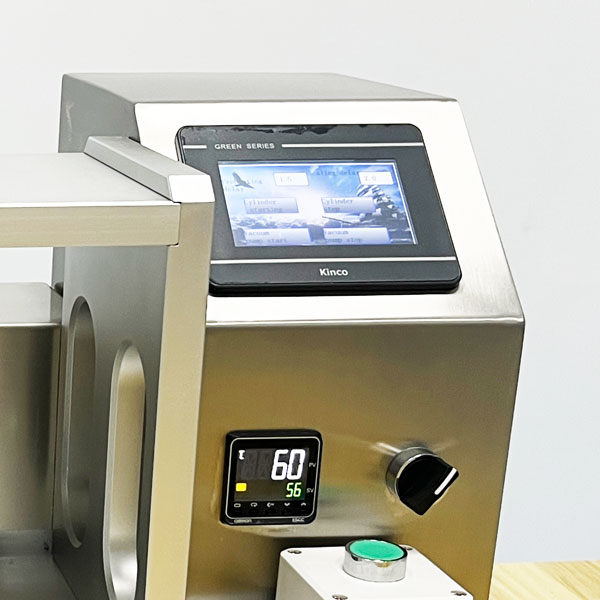
Set and record preheating time, sealing time and sealing temperature through the machine controls.
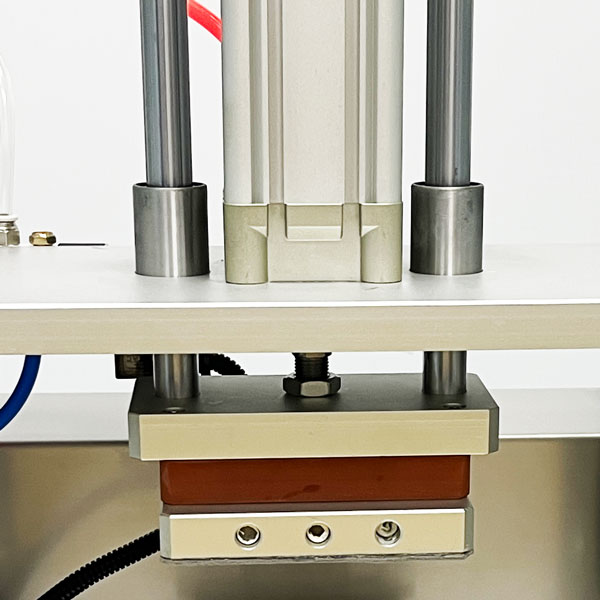
Pneumatic Forming and Sealing
The cylinder and guide rods move the heated pressing assembly over the mold for film preheating and sealing.
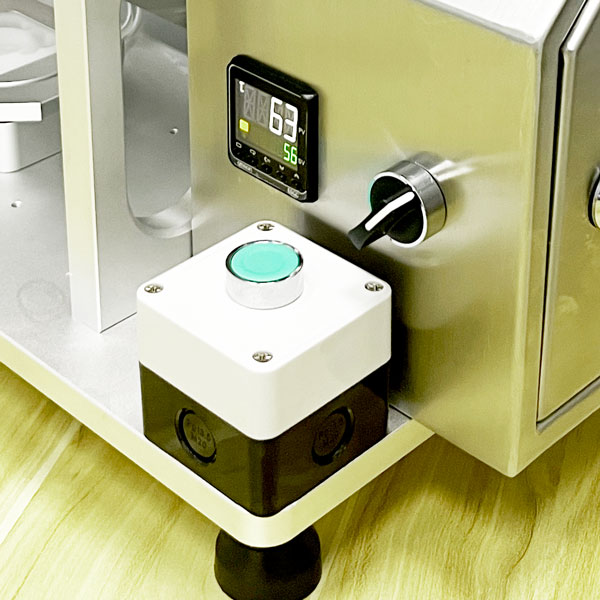
Separated Activation Buttons
The cycle is initiated by pressing the two separated buttons together, keeping both hands away from the central pressing area during activation.
Basic Requirements
Connect electrical power and clean compressed air. The oil-free vacuum pump forms the heated PVA/PVOH film into the installed laboratory mold.
01 — Form
Place the bottom film over the mold. Preheat it and use the oil-free vacuum pump to form the cavities.
02 — Fill
Manually dose the prepared liquid, powder or other test materials into the formed chambers.
03 — Seal
Apply water to the sealing side of the top film, cover the mold and activate the pneumatic sealing cycle.
04 — Trim
Remove the sealed film assembly and trim the excess film to obtain the finished pod sample.
ADJUSTABLE LABORATORY CONDITIONS
Adapt the Sample Process to Different Films, Molds and Products
The main adjustable settings help researchers establish a repeatable laboratory sample-making method.
Preheating Time
Adjusts how long the bottom film is heated before forming.
Sealing Temperature
Adjusts the heating condition applied during laboratory sealing.
Sealing Time
Adjusts how long the film layers remain under the sealing condition.
Air Pressure
Adjusts the pneumatic pressing force. An optional sensor can provide a direct pressure reading.
Laboratory Data Boundary
Laboratory pressure, temperature and time settings should not be copied directly to an industrial line. Production equipment uses different molds, pressure distribution, transport, cycle time and sealing conditions.
WHAT THE SAMPLE IS USED FOR
Turn a Formula or Material into Testable Product Evidence
The machine's value appears after the sample is produced and used in a defined R&D workflow.
Formula–Film Compatibility
Observe leakage, film changes, seal behavior and other interactions under agreed conditions.
PVA Film Comparison
Compare forming, sealing, ageing and dissolution while keeping the formula and mold unchanged.
Mold and Shape Validation
Evaluate forming depth, stretch, chamber volume, sealing area, elasticity and appearance.
Stability and Ageing
Prepare samples for controlled storage and observe deformation, leakage, sticking or material changes.
Dissolution Testing
Evaluate opening, dissolution and visible residue under an agreed test method.
Performance Testing
Use a defined dose in cleaning tests against an agreed benchmark and protocol.
Workflow Position
Formula or material selection → laboratory pod sample → compatibility and stability tests → product-route decision → pre-production validation.
A CONCRETE LABORATORY CAPABILITY
Convert Equipment Delivery into Repeatable Development Value
The project should deliver the physical tools and the minimum methods needed to begin making useful pod samples—not only an isolated machine.
Core Equipment
- Laboratory pod prototyping machine
- Oil-free vacuum pump
- Laboratory mold and pressing components
- Operating instructions
Optional Development Tools
- Additional or custom molds
- PVA/PVOH film
- 3D printer and digital mold workflow
- Pressure-sensor option
Technical Introduction
- Sample-making method
- Film and mold handling
- Basic formula introduction
- Test-method and troubleshooting guidance within the agreed scope
LABORATORY MACHINE CONFIGURATION
Tell Us What Type of Pod You Need to Prototype
Provide the intended application, materials, pod dimensions, chamber structure and testing objective. Unimasses can recommend the machine configuration, mold, film and supporting technical package.
Information Required
- Company and country
- Laundry, dishwasher or cleaning application
- Liquid, powder or powder–liquid materials
- Pod weight, size and chamber structure
- Required mold and film
- Main testing objective
- Expected timeline and support scope